Please note, we do not offer support for the Qingping IoT app so if you have any questions, please direct it to Qingping via the app. We have created this page simply to get you delving into data because the more you understand the air you breathe, the more you can avoid being in a polluted space.
Why Use This App?
The primary app for the QP air monitors is the Qingping+ app available on both Apple and Google stores. It is user-friendly and provides all the basic information you need such as:
- Accessing the settings of your QP Lite
- Chart data for last 24 hours, 7 days and 30 days
- Ability to email raw data
- Detailed information on what each sensor does and what thresholds are set for the visual colour bar
The Qingping IoT app offers all of the above except the last one but offers richer access to data. If you’re looking to have more control, or you're nerdy like the Smart Air team, then the Qingping IoT is the app for you.
Downloading the App and Registering an Account
Download the App
You can find the app on most app stores, just search for Qingping IoT and download the app. On the Apple App Store it has the name ‘青萍物联’ and the app icon is ‘qingping’ in a circle on a white background.
Register With a Phone Number
- Select the correct country code. To find the UK type ‘44’ and select the one under ‘U’. It should say ‘英国’
- Enter your phone number and name
- Follow the verification instructions
- Create a password
Register With an Email Address
- Enter email address and name
- Verify account with verification code sent to your email
- Create a password
Connect a Device
QP Pro
On the QP Pro:
- Swipe to the options page and select the hexagonal settings button
- Select the Qingping IoT App option and press ‘Next’ to get verification code
On the Qingping IoT App:
- Press the ‘+” in the top right corner to open the ‘Add Device’ screen
- Select ‘Air Monitor’ and then ‘I Can See the Verification Code’
- Enter code displayed on your QP Pro
- Name your monitor and add to a group if you would like to
Your QP Pro should now appear on the ‘Devices’ screen of the app. It may take a moment to load correctly.
QP Lite
On the Qingping IoT App:
- Press the ‘+” in the top right corner to open the ‘Add Device’ screen
- Select ‘Air Monitor Lite’
On the QP Lite:
- Press and hold the bar at the top until the Wi-Fi icon appears
On the Qingping IoT App:
- Select your Wi-Fi network and enter the password
- Name your monitor and add to a group if you would like to
Your QP Lite should now appear on the ‘Devices’ screen of the app. It may take a moment to load correctly.
Features of the App
Check Readings
The ‘Devices’ page of the app shows a summary of the readings from all of your air monitors. If you would like to see more details then simply select an air monitor.
At the top of the page is the summary of the current readings and under the summary is a graph of recent readings. You can change the timescales of the graph to 24-hours, 7-days or 30-days by selecting the drop down menu. You can also switch between tabs at the top of the graph to show graphs of the particle count (PM2.5), gas levels (tVOC) , carbon dioxide levels (CO2), temperature (Temp) and humidity (RH).
Device Management
Selecting the slider icon in the top right corner opens the ‘Device Management’ page where you can:
- Rename your device
- Add it to a group (useful if you have multiple devices in various locations)
- Check for software updates
- Add triggers for alerts (see the 'Add Triggers' section for more details)
- Change the intervals of uploading and recording (see the 'Change Uploading and Recording Intervals' for more details)
On the QP Lite you can also:
- Change the screen saver settings
- Change the ‘Screen Auto-off While Using Battery’ settings - If you wish to use the QP Lite while out and about, switch auto off to 'never' otherwise it defaults to switching off to preserve the battery
- Choose ‘Screen Auto-off During Night’
- Choose between celsius and fahrenheit
- Reset the CO2 sensor
On the QP Pro these settings can be changed on the device itself.
Add Triggers
Triggers are used to notify you when a reading rises above, or falls below, a certain threshold. You can create as many as you want and customise them for your personal needs. These trigger alerts will appear on your phone.
After a recent update the app no longer allows you to add triggers for the QP Lite. However, this is still possible via the Qingping IoT web version. To do this simply log in, select your device, select 'Settings' and then 'Triggers'. The rest of the instructions are the same as the ones given below for the QP Pro.
To set up a trigger for the QP Pro:
- Go to the ‘Device Management’ page by selecting your monitor and then selecting the slider icon in the top right corner
- Select ‘Triggered Uploading and Alert’
- Select the ‘+’ button in the top right corner
- Choose the reading you wish to monitor
- Choose if you want to be notified when readings are above or below a threshold
- Choose the value of this threshold
Once you have a trigger set up you’ll receive a notification if the threshold is passed. In the app the bell icon will change colour and the reading in question will be highlighted in red. Select the bell icon to see your notification history.
Change Uploading and Recording Intervals
The QP Lite and QP Pro are set to record and upload every 15 minutes by default. To change this, just select the ‘Interval of Recording’ or ‘Interval of Uploading’ button and select your preferred interval. We recommend the upload time is no less than 5m otherwise this could take up too much space on your phone.
Export Historical Data
You can export historical data in raw form so you can analyse it in more depth.
To export historical data:
- Go to the ‘Device Management’ page by selecting your monitor and then selecting the slider icon in the top right corner
- Select ‘Export Historical Data’
- Select the window of data you would like to export
- Enter the email address you want the data sent to
- Check your emails to download the data
Creating a Team
Create a team to allow more than one person to connect to your monitor. This can be particularly helpful in an office environment or in a household with more than one adult.
To create a team:
- Go to the ‘More’ page by selecting the icon at the bottom of the screen
- Select ‘Teamwork’
- Choose a team name
- Invite team members via phone number, email, link or QR code
Once a team has been created you can see a members list and also adjust who receives each type of notification.
-
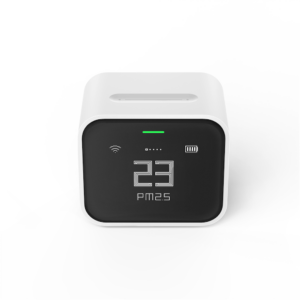 QP Lite Air Quality Monitor£99.00 Price excl. VAT: £82.50
 -
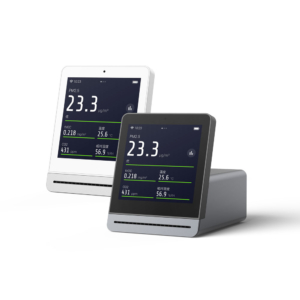 QP Pro Air Quality Monitor£144.00

